
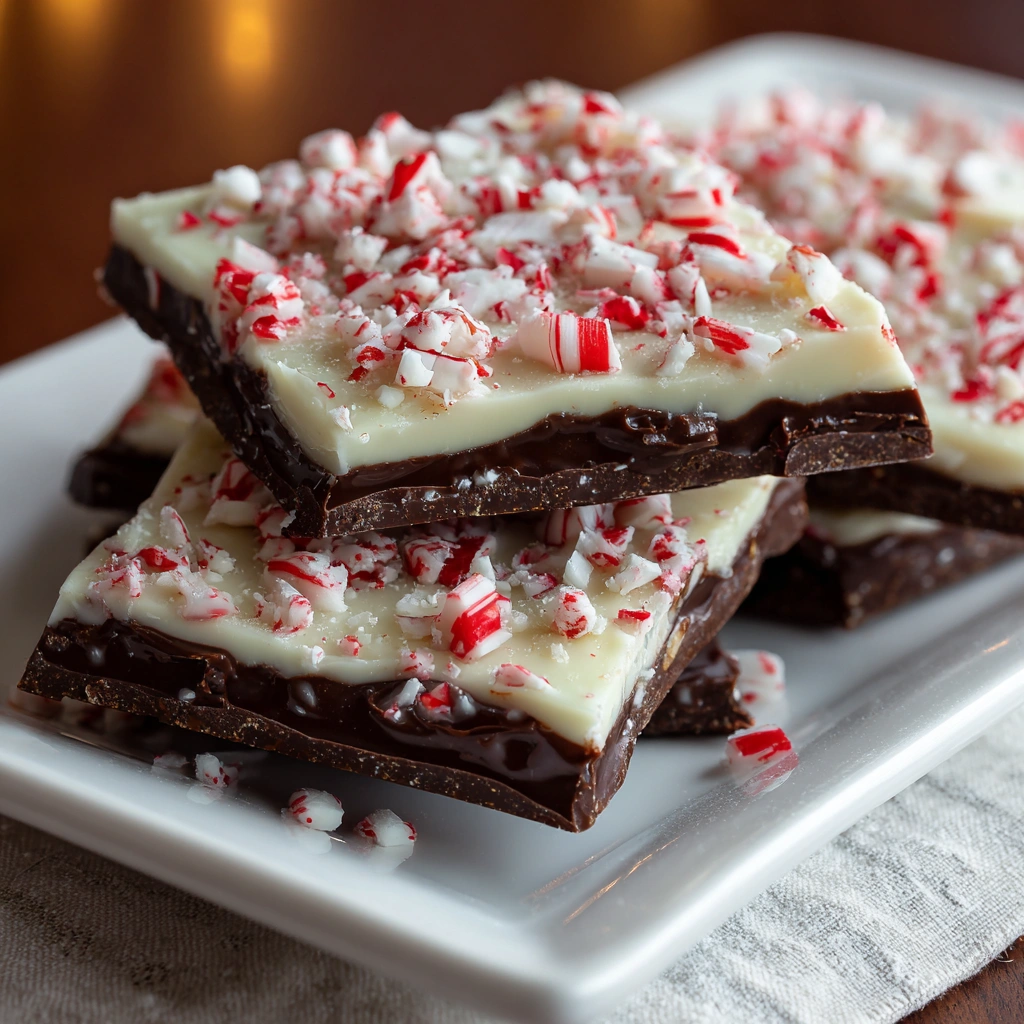
Peppermint Bark
Introduction to Peppermint Bark
Ah, the holiday season! It’s that magical time of year when we all crave something sweet and festive. Peppermint Bark is one of those delightful treats that brings joy to both the maker and the eater. As a busy mom, I know how precious time can be, especially during the holidays. This recipe is a quick solution for those hectic days when you want to impress your loved ones without spending hours in the kitchen. With just a few simple ingredients, you can create a beautiful and delicious treat that’s perfect for gifting or enjoying with family.
Why You’ll Love This Peppermint Bark
This Peppermint Bark is a true lifesaver during the busy holiday season. It’s incredibly easy to make, requiring minimal effort and time. In just under an hour, you can whip up a batch that’s not only visually stunning but also bursting with flavor. The combination of rich chocolate and refreshing peppermint creates a delightful treat that everyone will adore. Plus, it’s perfect for sharing, making it a wonderful addition to any holiday gathering!
Ingredients for Peppermint Bark
Gathering the right ingredients is the first step to creating your Peppermint Bark masterpiece. Here’s what you’ll need:
- Dark Chocolate: This rich chocolate forms the base layer. Choose a high-quality brand for the best flavor.
- White Chocolate: The creamy layer on top adds sweetness and a beautiful contrast to the dark chocolate. Again, quality matters here!
- Crushed Peppermint Candies: These little gems provide that signature minty crunch. You can use store-bought or crush your own candy canes for a festive touch.
Feel free to get creative! You can swap dark chocolate for milk chocolate if you prefer a sweeter taste. If you want to make it a bit more decadent, consider adding a sprinkle of sea salt on top for a sweet and salty combo. The exact measurements for these ingredients are at the bottom of the article, ready for you to print out and take to the kitchen!
How to Make Peppermint Bark
Now that you have your ingredients ready, let’s dive into the fun part—making your Peppermint Bark! This no-bake treat is simple and satisfying. Follow these steps, and you’ll have a delicious holiday treat in no time!
Step 1: Prepare Your Baking Sheet
Start by lining a baking sheet with parchment paper. This makes for easy removal and cleanup later. Just cut a piece of parchment to fit the sheet, and press it down so it sticks. It’s like giving your bark a cozy bed to rest on!
Step 2: Melt the Dark Chocolate
Next, grab a microwave-safe bowl and add your dark chocolate. Microwave it in 30-second intervals, stirring each time until it’s smooth. This is crucial! Stirring helps prevent the chocolate from overheating and seizing up. We want silky chocolate, not a clumpy mess!
Step 3: Spread the Dark Chocolate
Once your dark chocolate is melted, pour it onto the prepared baking sheet. Use a spatula to spread it evenly across the surface. Aim for a nice, even layer. This will be the foundation of your Peppermint Bark, so make it count!
Step 4: Chill the Dark Chocolate Layer
Now, it’s time to chill! Pop the baking sheet into the refrigerator for about 10 minutes. This allows the dark chocolate to set properly. You can use this time to clean up a bit or sip on some hot cocoa—because why not?
Step 5: Melt the White Chocolate
While the dark chocolate is chilling, melt your white chocolate in another microwave-safe bowl. Just like before, heat it in 30-second bursts, stirring until it’s smooth. White chocolate can be a bit trickier, so keep an eye on it to avoid burning!
Step 6: Layer the White Chocolate
Once your white chocolate is ready, pour it over the set dark chocolate layer. Use your spatula to spread it evenly. This creates a beautiful contrast and adds that sweet touch we all love. It’s like a winter wonderland in your kitchen!
Step 7: Add Crushed Peppermint
Now for the fun part! Sprinkle the crushed peppermint candies generously over the white chocolate layer. Make sure to cover it well; we want that minty crunch in every bite. It’s like adding a festive confetti to your creation!
Step 8: Final Chill
Return the baking sheet to the refrigerator for about 30 minutes. This final chill allows the entire bark to set completely. Patience is key here, but trust me, it’s worth the wait!
Step 9: Break and Serve
Once the bark is fully set, take it out of the fridge. Use your hands to break it into pieces. You can make them as big or small as you like. Serve it up on a festive plate or package it for gifts. Either way, it’s sure to bring smiles!
Tips for Success
- Use high-quality chocolate for the best flavor and texture.
- Make sure to stir the chocolate frequently while melting to avoid burning.
- Let each layer cool completely before adding the next for a clean finish.
- Store your Peppermint Bark in an airtight container to keep it fresh.
- Feel free to experiment with toppings like nuts or drizzled chocolate!
Equipment Needed
- Baking Sheet: A standard size works well, but a rimmed sheet can prevent spills.
- Parchment Paper: If you don’t have this, aluminum foil can be a good substitute.
- Microwave-Safe Bowls: Any heatproof bowl will do, just ensure it’s large enough for melting chocolate.
- Spatula: A silicone spatula is great for spreading chocolate evenly.
Variations of Peppermint Bark
- Milk Chocolate Bark: Swap dark chocolate for milk chocolate for a sweeter, creamier treat that kids will love.
- Dark Chocolate Mint Bark: Add a few drops of peppermint extract to the melted dark chocolate for an extra minty kick.
- Nutty Peppermint Bark: Sprinkle chopped nuts, like almonds or pecans, on top of the white chocolate layer for added crunch and flavor.
- Vegan Peppermint Bark: Use dairy-free chocolate options to create a vegan-friendly version that everyone can enjoy.
- Spicy Peppermint Bark: Add a pinch of cayenne pepper to the melted dark chocolate for a surprising spicy twist!
Serving Suggestions for Peppermint Bark
- Pair your Peppermint Bark with a warm cup of hot cocoa for a cozy treat.
- Serve it alongside a festive cheese platter for a sweet and savory contrast.
- Present the bark in a decorative tin or box for a charming gift.
- Top with a dollop of whipped cream for an indulgent dessert experience.
FAQs about Peppermint Bark
Can I use different types of chocolate for Peppermint Bark?
Absolutely! You can swap dark chocolate for milk chocolate or even white chocolate if you prefer a sweeter treat. Just remember, the flavor will change slightly, but it’ll still be delicious!
How do I store Peppermint Bark?
Store your Peppermint Bark in an airtight container at room temperature. If you live in a warm climate, it’s best to keep it in the fridge to prevent melting. Just make sure it’s well-sealed!
Can I make Peppermint Bark ahead of time?
Yes! Peppermint Bark can be made several days in advance. It actually tastes even better after a day or two as the flavors meld together. Just keep it stored properly!
What can I use instead of peppermint candies?
If you can’t find peppermint candies, crushed candy canes work wonderfully! You can also try using chocolate-covered peppermint candies for a twist.
Is Peppermint Bark gluten-free?
Yes, Peppermint Bark is naturally gluten-free, making it a great treat for those with gluten sensitivities. Just double-check the chocolate and candy packaging to be sure!
Final Thoughts
Making Peppermint Bark is more than just a recipe; it’s a delightful experience that brings warmth and joy to the holiday season. The process of melting chocolate and sprinkling crushed peppermint is like creating a little piece of magic in your kitchen. Each bite is a reminder of festive gatherings and cherished moments with loved ones. Whether you’re gifting it or enjoying it yourself, this treat is sure to spread smiles. So, roll up your sleeves, embrace the holiday spirit, and let the sweet aroma of chocolate and peppermint fill your home. Happy baking!
Print
Peppermint Bark: Discover the Secret to Perfect Treats!
- Total Time: 50 minutes
- Yield: 12 servings 1x
- Diet: Vegetarian
Description
Peppermint Bark is a delightful holiday treat made with layers of chocolate and crushed peppermint candies, perfect for gifting or enjoying during the festive season.
Ingredients
- 8 oz dark chocolate
- 8 oz white chocolate
- 1/2 cup crushed peppermint candies
Instructions
- Line a baking sheet with parchment paper.
- Melt the dark chocolate in a microwave-safe bowl, stirring every 30 seconds until smooth.
- Pour the melted dark chocolate onto the prepared baking sheet and spread it evenly.
- Refrigerate for about 10 minutes until set.
- Melt the white chocolate in a separate bowl, stirring until smooth.
- Pour the melted white chocolate over the dark chocolate layer and spread evenly.
- Sprinkle the crushed peppermint candies on top of the white chocolate.
- Refrigerate again until fully set, about 30 minutes.
- Once set, break into pieces and serve or package for gifts.
Notes
- Ensure the chocolate does not overheat while melting.
- Use a good quality chocolate for the best flavor.
- Store in an airtight container to maintain freshness.
- Prep Time: 15 minutes
- Cook Time: 5 minutes
- Category: Dessert
- Method: No-Bake
- Cuisine: American
Nutrition
- Serving Size: 1 piece
- Calories: 150
- Sugar: 12g
- Sodium: 10mg
- Fat: 8g
- Saturated Fat: 5g
- Unsaturated Fat: 2g
- Trans Fat: 0g
- Carbohydrates: 18g
- Fiber: 1g
- Protein: 2g
- Cholesterol: 5mg
Keywords: Peppermint Bark, Holiday Treats, Chocolate, Dessert