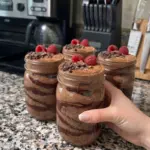
Description
- Prep time: Approximately 15–20 minutes
- Chill time: 1–2 hours
- Total time: Approximately 1 hour 15 minutes to 2 hours 20 minutes
- Servings: 4 cups
- Method: No oven; microwave melting and refrigeration
Ingredients
Chocolate Greek Yogurt Base
- 2 cups plain nonfat Greek yogurt, thick and strained
- 1 scoop chocolate protein powder, approximately 30 grams according to the label
- 2 tablespoons unsweetened cocoa powder
- Up to 3 tablespoons powdered sugar-free sweetener, adjusted to taste and product strength
- 1 teaspoon vanilla extract
- Up to 2 tablespoons unsweetened almond milk, only as needed
- A small pinch of salt
Chocolate Swirl
- 1/4 cup sugar-free chocolate chips suitable for melting
- 1 tablespoon creamy peanut butter or almond butter, stirred smooth
- 1 teaspoon coconut oil
- Up to 1 tablespoon unsweetened almond milk, warmed, optional for adjusting the swirl
Optional Toppings
- 1 tablespoon mini chocolate chips, divided among the cups
- 1 tablespoon chopped dark chocolate, divided among the cups
- A light dusting of cocoa powder
- A few washed and dried fresh raspberries
Yield: Four spoon-served dessert cups. Containers holding approximately five to six ounces provide useful room for the filling and a lid, but the finished volume varies.
The almond milk allowances are separate: up to two tablespoons for the yogurt and up to one tablespoon for the swirl. Neither amount must be used in full.
Instructions
1. Smooth the yogurt
Place the measured Greek yogurt in a bowl and whisk briefly until smooth. Break up any lumps without adding milk yet.
If there is a visible puddle of whey in the container, pour that away before measuring. The aim is a thick base, not a mixture that needs extensive thickening later.
2. Combine the dry flavorings
Sift or stir the protein powder and cocoa together to remove clumps. Add them to the yogurt in portions, mixing and scraping the bowl between additions.
Add the vanilla, a small pinch of salt, and an initial amount of sweetener. Stir until the chocolate color is even and no dry pockets remain at the bottom.
Avoid adding the full sweetener amount before tasting, particularly with a strongly sweetened protein powder.
3. Let the base hydrate
Allow the mixture to stand for about three to five minutes. This gives the powders time to absorb moisture and makes the final adjustment easier to judge.
Stir again and assess. A base that looked slightly loose at first may now be thick enough without almond milk.
This short rest is for texture, not a required setting process. Keep the preparation moving rather than leaving dairy on the counter for a long period.
4. Adjust by the teaspoon
If the base is too stiff to stir or spoon comfortably, add almond milk one teaspoon at a time. Mix after each addition.
Aim for a thick, smooth filling that forms a soft mound. It should spread into the cups without pouring like a drink.
Taste with a clean spoon and adjust the sweetness. If the base is too thin, chill briefly before making large changes; do not repeatedly add protein powder without considering its flavor and sweetness.
5. Portion the base
Divide the mixture evenly among four cups. Smooth gently, leaving room above for the chocolate and any toppings.
For more visible internal ribbons, hold back a little base in the bowl. You can alternate a thin drizzle of chocolate with a second small spoonful of yogurt rather than keeping the entire swirl only on top.
There is no requirement to fill a container to a particular level. The ingredient quantity determines the portion, and cup capacity simply provides room to serve it.
6. Melt the chocolate mixture gently
Combine the chocolate chips, nut butter, and coconut oil in a microwave-safe bowl. Heat in 15-second bursts, stirring thoroughly between each.
Stop heating when a few small pieces remain and stir until they melt in the residual heat. This is gentler than continuing until every chip looks liquid in the microwave.
If the package recommends a different melting method, follow that guidance. Avoid scorching, which can create a thick or grainy mixture that more heat will not repair.
7. Decide whether milk is needed
The melted chocolate, nut butter, and coconut oil may already be fluid enough for thin ribbons. If so, omit the swirl milk.
Adding a small amount of water-based liquid to melted chocolate can cause it to thicken or seize, especially when the liquid is cold. The supplied tablespoon of almond milk is therefore an optional adjustment, not a guaranteed route to a glossy sauce.
If trying it, warm the milk first and stir it in gradually while the chocolate is warm, following the chocolate product’s guidance. Expect the texture to change. If the mixture becomes a thick paste, stop and assess rather than repeatedly overheating it or pouring in unmeasured milk.
For a first batch, using the milk-free chocolate-nut-butter mixture is the simpler starting point when it already drizzles comfortably.
8. Cool to lukewarm
Let the melted mixture cool slightly until it is no longer hot but remains workable. This reduces the chance of warming the yogurt surface excessively.
Do not wait until it is cold and firm. If it thickens before assembly, warm briefly and stir again.
The cooler yogurt will begin setting the chocolate on contact, so work one cup at a time.
9. Create the ribbons
Drizzle a small amount over each portion. Use a toothpick or narrow utensil to make a few gentle passes through the chocolate and yogurt.
Stop while distinct ribbons remain. Extensive stirring produces a uniform chocolate filling rather than a visible swirl.
For layered cups, add a little reserved yogurt over an initial drizzle, then finish with another small drizzle. Keep the total chocolate divided evenly across all four servings.
10. Chill and garnish
Cover the cups and refrigerate for one to two hours, or until cold and the swirl has firmed to your liking. Two hours is a useful planning target rather than a guarantee of a sliceable set.
Add optional chocolate pieces or cocoa before serving. Wash and dry raspberries and add them close to eating to reduce extra moisture on the surface.
Serve straight from the refrigerator with a spoon. A brief stand of a few minutes can soften firmer chocolate ribbons, but keep the rest of the batch chilled.