
Red Velvet Cheesecake: Discover This Irresistible Recipe!
Introduction to Red Velvet Cheesecake
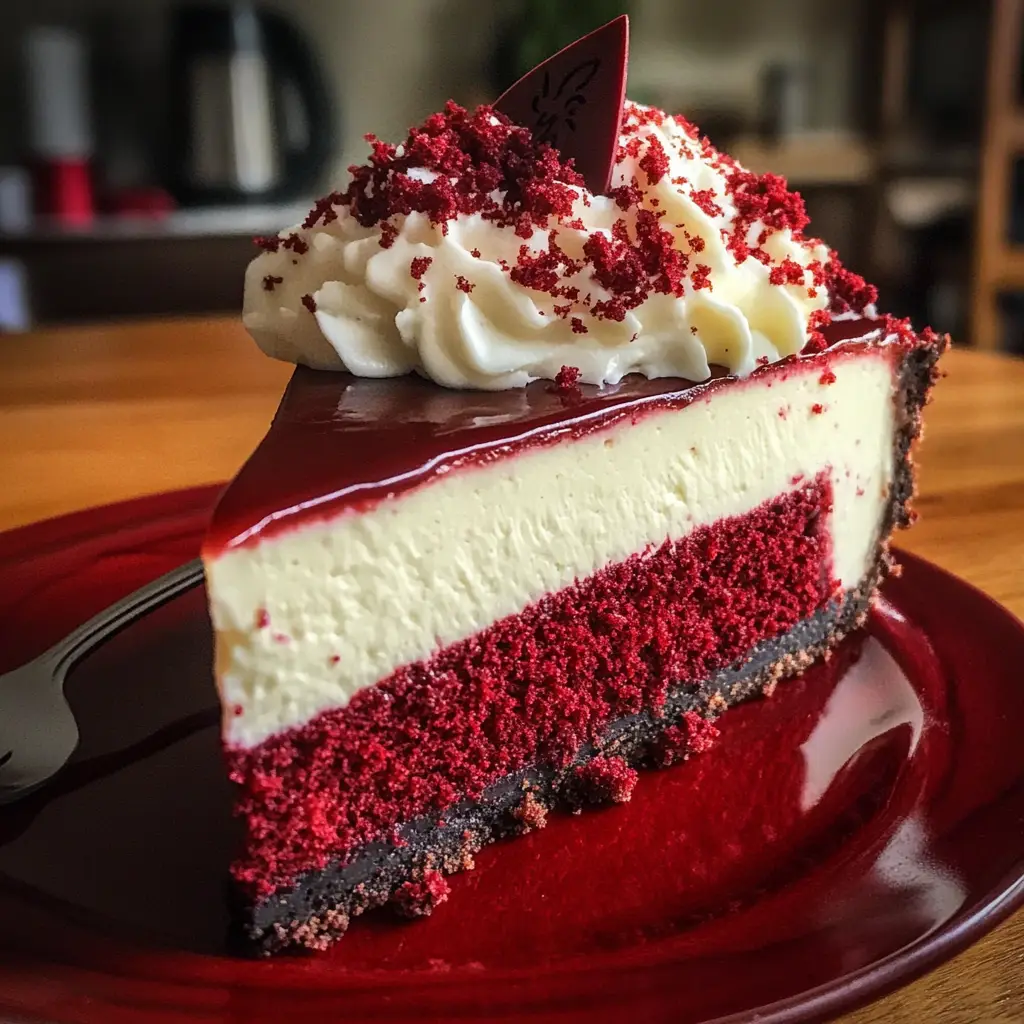
As a passionate home cook, I know how hectic life can get, especially for busy moms and professionals. That’s why I’m excited to share my Red Velvet Cheesecake recipe with you! This dessert is not just a feast for the eyes; it’s a delightful blend of rich flavors that will impress your loved ones. Whether you’re celebrating a special occasion or just need a sweet treat after a long day, this cheesecake is the perfect solution. Trust me, once you try it, you’ll want to make it again and again!
Why You’ll Love This Red Velvet Cheesecake
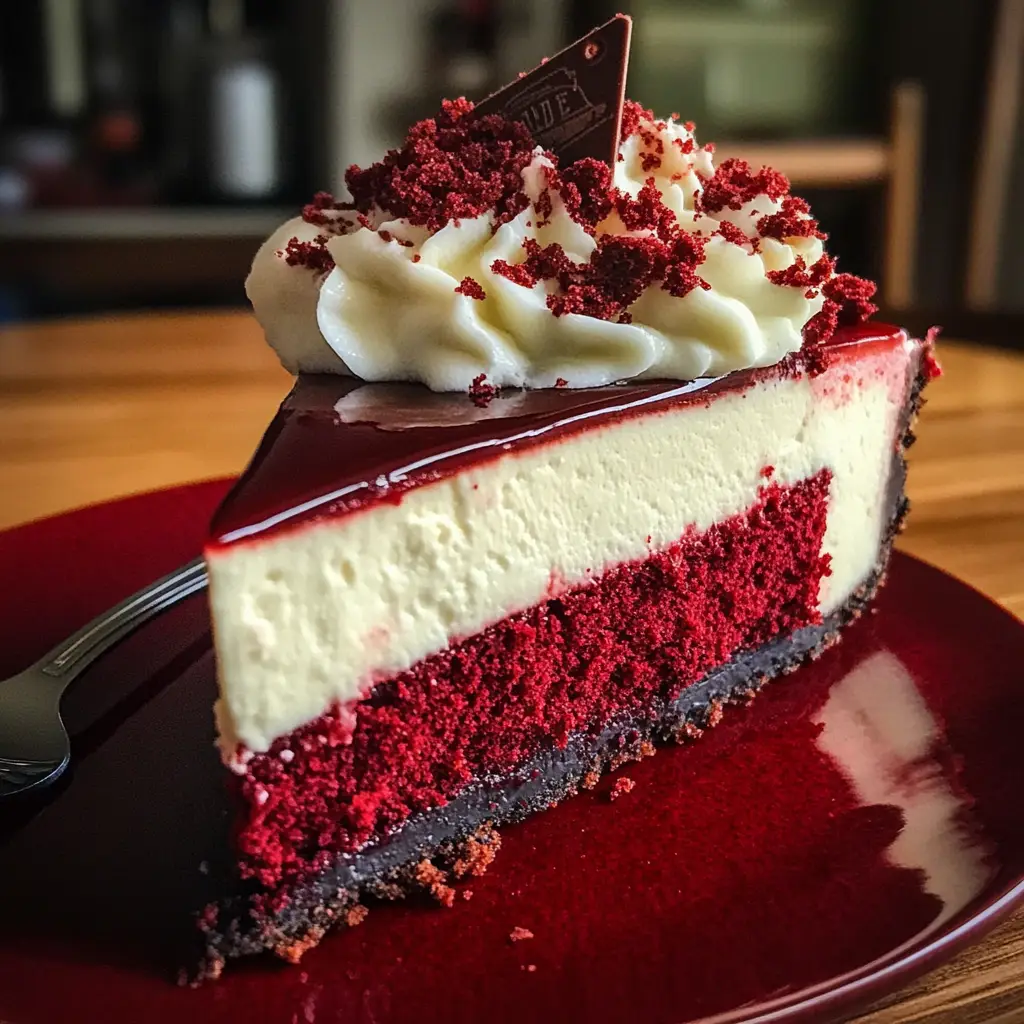
This Red Velvet Cheesecake is a game-changer for your dessert repertoire. It’s incredibly easy to whip up, making it perfect for those busy weeknights or last-minute gatherings. The taste? Oh, it’s a heavenly combination of creamy cheesecake and the classic red velvet flavor we all adore. Plus, it’s visually stunning, so it’s sure to be the star of any table. You’ll love how it brings smiles to faces, one slice at a time!
Ingredients for Red Velvet Cheesecake
Gathering the right ingredients is the first step to creating your delicious Red Velvet Cheesecake. Here’s what you’ll need:
- Graham cracker crumbs: These form the base of your cheesecake crust, providing a sweet and crunchy texture.
- Unsalted butter: Melted butter binds the crumbs together, ensuring a firm crust that holds its shape.
- Cream cheese: The star of the show! Softened cream cheese gives the cheesecake its rich and creamy texture.
- Granulated sugar: This sweetens the filling, balancing the tanginess of the cream cheese.
- Eggs: They help set the cheesecake, giving it structure and a smooth consistency.
- Sour cream: Adds a delightful tang and creaminess, enhancing the overall flavor.
- Vanilla extract: A splash of vanilla elevates the taste, adding warmth and depth.
- Cocoa powder: Just a touch of cocoa gives a hint of chocolate flavor, complementing the red velvet beautifully.
- Red food coloring: This is what makes your cheesecake pop with that iconic red hue. Adjust to your preference for a more vibrant color.
- Heavy whipping cream: Used for the luscious topping, it adds a light and airy finish to your cheesecake.
- Powdered sugar: Sweetens the whipped cream topping, making it even more delightful.
For exact measurements, check the bottom of the article where you can find everything listed for easy printing. Happy baking!
How to Make Red Velvet Cheesecake
Now that you have your ingredients ready, let’s dive into the steps to create this stunning Red Velvet Cheesecake. Each step is simple, and I promise you’ll feel like a pro in no time!
Step 1: Preheat the Oven
First things first, preheat your oven to 325°F (160°C). Preheating is crucial because it ensures that your cheesecake bakes evenly. A hot oven helps set the filling just right, giving you that perfect creamy texture.
Step 2: Prepare the Crust
In a mixing bowl, combine your graham cracker crumbs with the melted butter. Stir until the crumbs are fully coated. This mixture should resemble wet sand. Now, press it firmly into the bottom of your springform pan. Don’t skip this step! A well-pressed crust provides a sturdy base for your cheesecake.
Step 3: Make the Cheesecake Filling
In a large mixing bowl, beat the softened cream cheese and granulated sugar together until smooth. This is where the magic begins! Next, add the eggs one at a time, mixing well after each addition. This method helps incorporate air, making your cheesecake light and fluffy.
Step 4: Add Flavor and Color
Now it’s time to add the fun stuff! Stir in the sour cream, vanilla extract, cocoa powder, and red food coloring. Mix until everything is well combined. The cocoa powder adds a subtle chocolate flavor, while the red food coloring gives your cheesecake that iconic hue. Feel free to adjust the color to your liking!
Step 5: Bake the Cheesecake
Pour the cheesecake batter over your prepared crust in the springform pan. Bake for 50-60 minutes. You’ll know it’s done when the center is set but still slightly jiggly. This slight jiggle is key to a creamy texture, so don’t overbake!
Step 6: Cooling Process
Once baked, turn off the oven and let the cheesecake cool inside with the door ajar for about an hour. This cooling method helps prevent cracks on the surface. It’s a little trick I learned that makes a big difference!
Step 7: Refrigerate
After the cheesecake has cooled, transfer it to the refrigerator. Chill for at least 4 hours, or overnight if you can wait! Chilling allows the flavors to meld beautifully and gives the cheesecake its signature texture.
Step 8: Whip the Topping
When you’re ready to serve, whip the heavy cream and powdered sugar together until soft peaks form. Spread this luscious whipped cream over the top of your cheesecake. It adds a light, airy finish that perfectly complements the rich filling.
Tips for Success
- Make sure all ingredients are at room temperature for a smoother batter.
- Don’t rush the cooling process; it helps prevent cracks.
- Use a water bath for even baking if you prefer a creamier texture.
- For a more intense red color, add a bit more food coloring.
- Top with chocolate shavings or fresh berries for an extra touch!
Equipment Needed
- Springform pan: Essential for easy removal. A regular cake pan works too, but it may be trickier to serve.
- Mixing bowls: Use a large bowl for the filling and a smaller one for the crust.
- Electric mixer: A hand mixer or stand mixer makes beating the cream cheese a breeze.
- Spatula: Perfect for scraping down the sides of the bowl and spreading the whipped cream.
- Measuring cups and spoons: Accurate measurements are key for baking success!
Variations
- Chocolate Red Velvet Cheesecake: Add more cocoa powder to enhance the chocolate flavor for a richer taste.
- Gluten-Free Option: Substitute graham cracker crumbs with gluten-free cookie crumbs for a delicious gluten-free crust.
- Vegan Version: Use vegan cream cheese and a flaxseed mixture instead of eggs for a plant-based alternative.
- Fruit-Infused: Swirl in some raspberry or strawberry puree into the cheesecake batter for a fruity twist.
- Nutty Crust: Mix crushed nuts like pecans or almonds with the graham cracker crumbs for added texture and flavor.
Serving Suggestions
- Pair your Red Velvet Cheesecake with a scoop of vanilla ice cream for a delightful contrast.
- Serve alongside fresh berries like strawberries or raspberries to add a pop of color and tartness.
- Drizzle with chocolate or caramel sauce for an extra indulgent touch.
- Garnish with mint leaves for a refreshing finish.
- Enjoy with a cup of coffee or a glass of dessert wine to elevate the experience.
FAQs about Red Velvet Cheesecake
As you embark on your Red Velvet Cheesecake journey, you might have a few questions. Here are some common queries I’ve encountered, along with helpful answers to guide you along the way!
Can I make Red Velvet Cheesecake ahead of time?
Absolutely! In fact, making it a day in advance is ideal. This allows the flavors to meld beautifully and ensures a firmer texture. Just remember to keep it covered in the fridge until you’re ready to serve.
What can I use instead of red food coloring?
If you prefer a natural alternative, beet juice or pomegranate juice can work well. They’ll give your cheesecake a lovely hue without artificial coloring. Just keep in mind that the color may not be as vibrant.
How do I store leftover cheesecake?
Store any leftovers in an airtight container in the refrigerator. It should last for about 3-5 days. Just be sure to let it come to room temperature before serving for the best flavor and texture.
Can I freeze Red Velvet Cheesecake?
Yes, you can freeze it! Wrap individual slices tightly in plastic wrap and then place them in a freezer-safe container. It can last up to 2 months. Thaw in the fridge overnight before enjoying.
What’s the best way to cut cheesecake?
To get clean slices, use a sharp knife dipped in hot water. Wipe the knife clean between cuts for perfectly shaped pieces. This little trick makes a big difference in presentation!
Final Thoughts
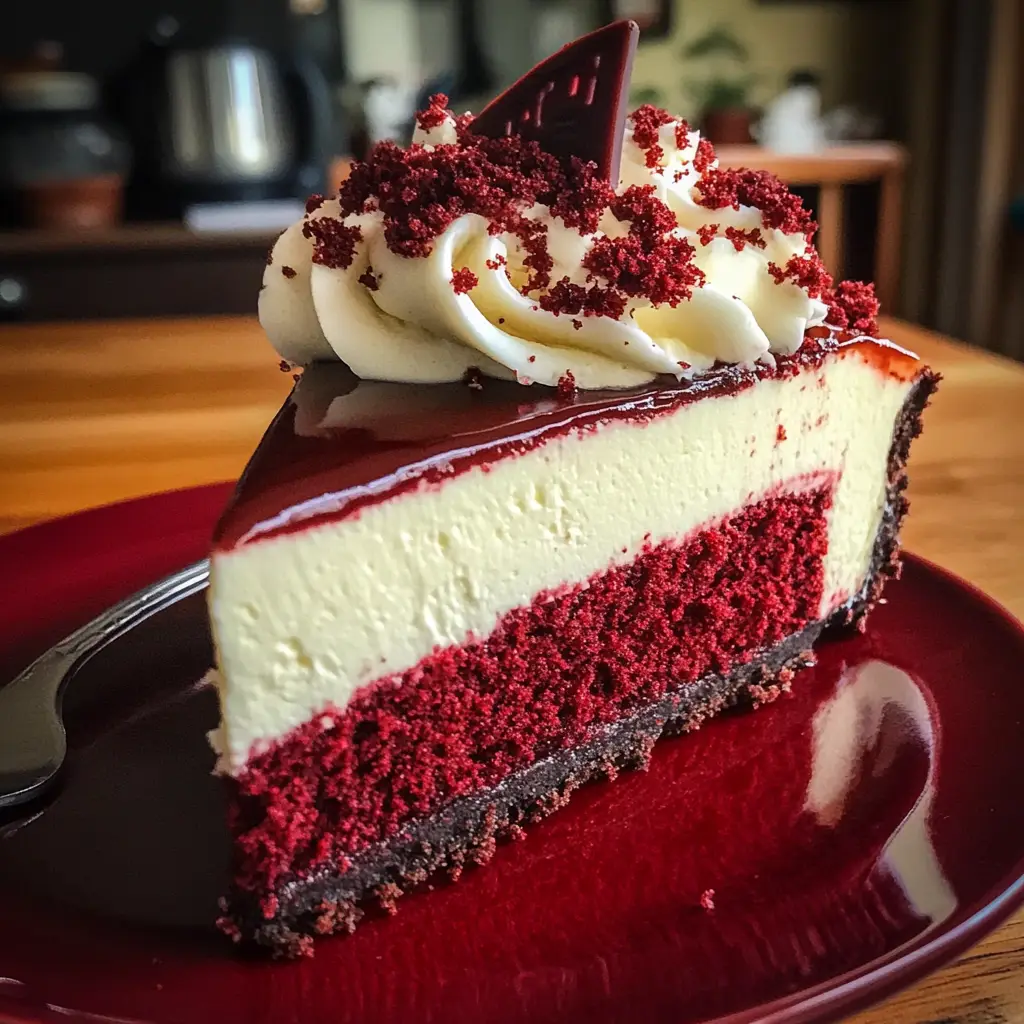
Creating this Red Velvet Cheesecake is more than just baking; it’s about crafting a moment of joy for yourself and your loved ones. The rich, creamy texture combined with that iconic red hue makes it a showstopper at any gathering. Each slice is a celebration, a sweet reminder that life’s little pleasures are worth savoring. So, whether you’re sharing it at a family dinner or enjoying a quiet moment with a cup of coffee, this cheesecake brings warmth and happiness to your table. Trust me, once you make it, you’ll find every reason to whip it up again!
PrintRed Velvet Cheesecake: Discover This Irresistible Recipe!
- Total Time: 4 hours 20 minutes
- Yield: 12 servings 1x
- Diet: Vegetarian
Description
A deliciously rich and creamy red velvet cheesecake that combines the classic flavors of red velvet cake with a smooth cheesecake filling.
Ingredients
- 1 ½ cups graham cracker crumbs
- ½ cup unsalted butter, melted
- 2 cups cream cheese, softened
- 1 cup granulated sugar
- 3 large eggs
- 1 cup sour cream
- 1 tablespoon vanilla extract
- 2 tablespoons cocoa powder
- 1 tablespoon red food coloring
- 1 cup heavy whipping cream
- ¼ cup powdered sugar
Instructions
- Preheat the oven to 325°F (160°C).
- In a bowl, mix graham cracker crumbs and melted butter until combined. Press into the bottom of a springform pan.
- In a large mixing bowl, beat cream cheese and granulated sugar until smooth.
- Add eggs one at a time, mixing well after each addition.
- Stir in sour cream, vanilla extract, cocoa powder, and red food coloring until fully incorporated.
- Pour the cheesecake batter over the crust in the springform pan.
- Bake for 50-60 minutes or until the center is set but still slightly jiggly.
- Turn off the oven and let the cheesecake cool in the oven with the door ajar for 1 hour.
- Refrigerate for at least 4 hours or overnight before serving.
- Whip heavy cream and powdered sugar until soft peaks form, then spread over the top of the cheesecake before serving.
Notes
- For a more intense red color, adjust the amount of red food coloring.
- Make sure all ingredients are at room temperature for a smoother batter.
- Serve with chocolate shavings or fresh berries for added flavor.
- Prep Time: 20 minutes
- Cook Time: 60 minutes
- Category: Dessert
- Method: Baking
- Cuisine: American
Nutrition
- Serving Size: 1 slice
- Calories: 450
- Sugar: 30g
- Sodium: 300mg
- Fat: 30g
- Saturated Fat: 18g
- Unsaturated Fat: 8g
- Trans Fat: 0g
- Carbohydrates: 40g
- Fiber: 1g
- Protein: 6g
- Cholesterol: 100mg
Keywords: Red Velvet Cheesecake, Cheesecake Recipe, Dessert Recipe