

Cheesy Taco Sticks: Your New Favorite Snack Recipe!
Introduction to Cheesy Taco Sticks
Hey there, fellow food lovers! If you’re anything like me, you know that life can get pretty hectic. Between juggling work, family, and everything in between, finding time to whip up a delicious snack can feel like a daunting task. That’s where these Cheesy Taco Sticks come in! They’re not just a quick solution for a busy day; they’re also a fun way to impress your loved ones. With gooey cheese and the bold flavors of tacos, these tasty treats are sure to become a favorite in your household. Let’s dive into this delightful recipe!
Why You’ll Love This Cheesy Taco Sticks
These Cheesy Taco Sticks are a game-changer for busy moms and professionals alike. They come together in just 30 minutes, making them perfect for those last-minute snack cravings. The combination of savory beef and melty cheese wrapped in flaky dough is simply irresistible. Plus, they’re versatile enough to please even the pickiest eaters in your family. Trust me, once you try them, you’ll be hooked!
Ingredients for Cheesy Taco Sticks
Gathering the right ingredients is key to making these Cheesy Taco Sticks a hit! Here’s what you’ll need:
- Taco seasoning: This adds that classic taco flavor. You can use store-bought or make your own for a personal touch.
- Ground beef: The star protein of this dish. Feel free to substitute with ground turkey or chicken for a leaner option.
- Shredded cheddar cheese: This cheese brings a sharp, tangy flavor that pairs perfectly with the beef.
- Shredded mozzarella cheese: For that gooey, melty texture that everyone loves!
- Crescent roll dough: This flaky dough is what wraps everything together. You can also use puff pastry if you prefer.
- Diced tomatoes: Fresh or canned, they add a burst of freshness and color to your sticks.
- Chopped green onions: These provide a nice crunch and a hint of onion flavor, elevating the dish.
- Sour cream: A creamy dip that complements the spicy flavors beautifully. You can swap it for Greek yogurt for a healthier twist.
For exact quantities, check the bottom of the article where you can find a printable version of the recipe. Happy cooking!
How to Make Cheesy Taco Sticks
Now that you have all your ingredients ready, let’s get cooking! Making these Cheesy Taco Sticks is a breeze, and I promise you’ll love every step of the process. Follow along, and soon you’ll have a delicious snack that’s sure to impress!
Step 1: Preheat the Oven
First things first, preheat your oven to 375°F (190°C). Preheating is crucial because it ensures that your Cheesy Taco Sticks bake evenly. A hot oven helps achieve that golden-brown finish we all crave!
Step 2: Cook the Ground Beef
Next, grab a skillet and cook the ground beef over medium heat. Stir it occasionally until it’s nicely browned. This usually takes about 5-7 minutes. Don’t forget to drain any excess fat; this keeps your snack a bit healthier and lets the flavors shine through!
Step 3: Add Taco Seasoning
Once your beef is browned, it’s time to add the taco seasoning. Follow the package instructions for the right amount of water to add. Stir everything together and let it simmer for about 5 minutes. This step is essential for infusing that classic taco flavor into your filling!
Step 4: Prepare the Crescent Roll Dough
Now, let’s roll out the crescent roll dough. Unwrap it and lay it flat on a clean surface. Cut the dough into triangles. Each triangle should be about 4-5 inches wide at the base. This shape is perfect for wrapping around your tasty filling!
Step 5: Assemble the Taco Sticks
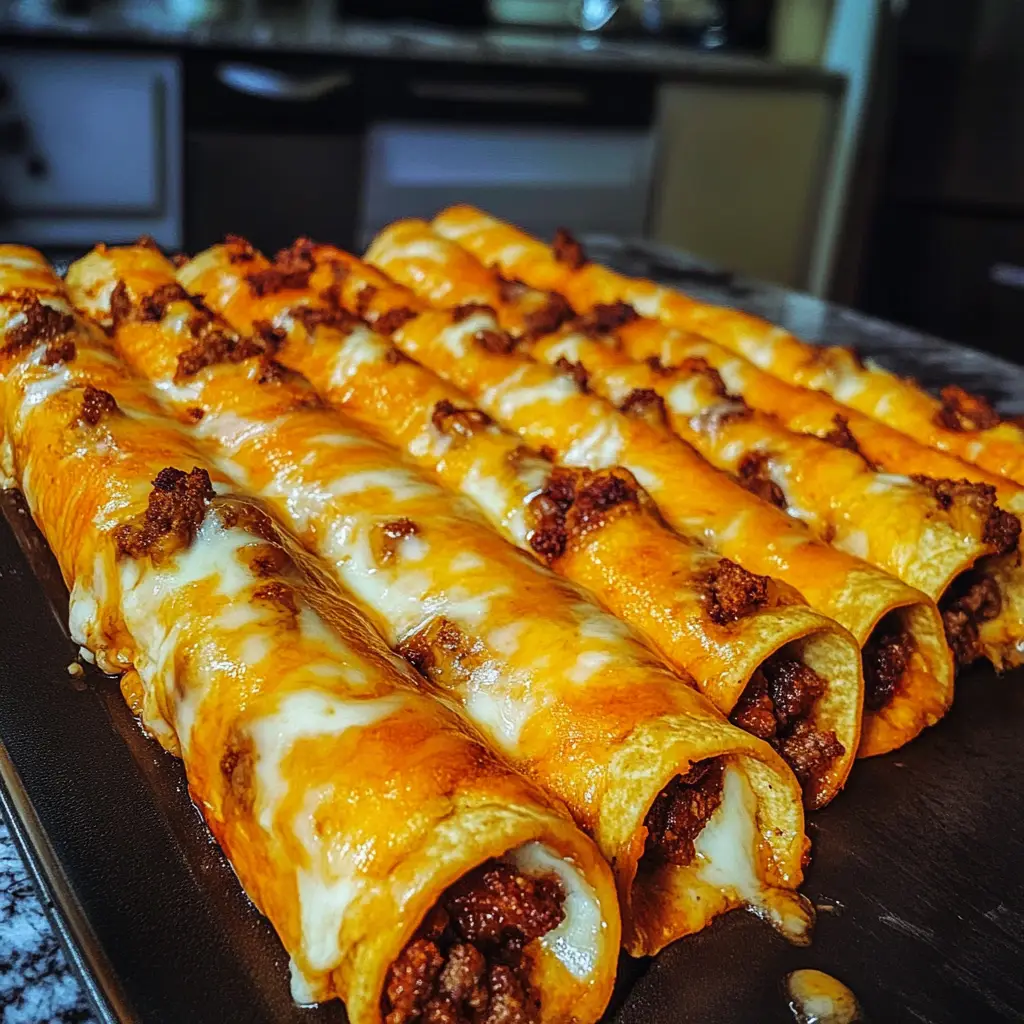
Time to assemble! Take a spoonful of the beef mixture and place it on the wide end of each triangle. Then, sprinkle a mix of cheddar and mozzarella cheese on top. The cheese is what makes these Cheesy Taco Sticks so irresistible!
Step 6: Roll and Seal
Now, roll the dough from the wide end to the tip, making sure to seal the edges well. This helps keep all that delicious filling inside while baking. You want to create a nice little package of flavor!
Step 7: Bake the Cheesy Taco Sticks
Place your rolled sticks on a baking sheet lined with parchment paper. Bake them in the preheated oven for 12-15 minutes. Keep an eye on them; you want them to be golden brown and flaky. The aroma will be heavenly!
Step 8: Serve and Enjoy
Once they’re out of the oven, let your Cheesy Taco Sticks cool for a minute. Serve them warm with diced tomatoes, chopped green onions, and a dollop of sour cream on the side. These garnishes add a fresh touch and make your snack even more delightful!
Tips for Success
- Make sure to preheat your oven for even baking.
- Don’t overcook the ground beef; it should be browned but not dry.
- Seal the edges of the dough tightly to prevent leaks.
- Experiment with different cheeses for unique flavors.
- For extra crunch, add some crushed tortilla chips to the filling.

Equipment Needed
- Skillet: A non-stick skillet works best, but any frying pan will do.
- Baking sheet: Use a regular baking sheet or a stone for even heat distribution.
- Parchment paper: This helps prevent sticking; aluminum foil is a good alternative.
- Knife: For cutting the dough and chopping ingredients.
- Spatula: Great for flipping and serving your tasty sticks!
Variations of Cheesy Taco Sticks
- Spicy Jalapeño: Add sliced jalapeños to the beef mixture for an extra kick. This is perfect for those who love a bit of heat!
- Vegetarian Option: Substitute the ground beef with black beans or lentils. Add some corn and bell peppers for a colorful and nutritious filling.
- Cheesy Spinach: Mix in some fresh spinach with the beef for added nutrients and a pop of color. It’s a sneaky way to get some greens in!
- Buffalo Chicken: Swap the beef for shredded cooked chicken and toss it in buffalo sauce. Serve with blue cheese dressing for a zesty twist.
- Gluten-Free Version: Use gluten-free crescent roll dough or puff pastry to make these Cheesy Taco Sticks suitable for gluten-sensitive friends.
Serving Suggestions for Cheesy Taco Sticks
- Fresh Salsa: Serve with a side of homemade or store-bought salsa for a zesty dip.
- Guacamole: Creamy guacamole pairs perfectly with the cheesy goodness.
- Chilled Beverages: Enjoy with a refreshing iced tea or a light beer.
- Colorful Platter: Arrange the sticks on a vibrant platter with garnishes for an eye-catching presentation.
FAQs about Cheesy Taco Sticks
Got questions about these Cheesy Taco Sticks? I’ve got answers! Here are some common queries that might pop up as you whip up this delicious snack.
Can I make Cheesy Taco Sticks ahead of time?
Absolutely! You can prepare the filling and assemble the sticks in advance. Just store them in the fridge for up to a day before baking. They’re perfect for meal prep!
How do I store leftovers?
Store any leftover Cheesy Taco Sticks in an airtight container in the fridge. They’ll stay fresh for about 3 days. Just reheat them in the oven for a few minutes to regain that crispy texture.
Can I freeze Cheesy Taco Sticks?
Yes! These tasty treats freeze beautifully. Assemble them, then place them on a baking sheet to freeze individually. Once frozen, transfer them to a freezer bag. Bake from frozen, adding a few extra minutes to the cooking time.
What can I serve with Cheesy Taco Sticks?
These sticks pair wonderfully with fresh salsa, guacamole, or a side salad. You can also serve them with a variety of dips for a fun snack platter!
Are there any dietary modifications I can make?
Definitely! You can make a vegetarian version by using black beans or lentils. For a gluten-free option, just swap the crescent roll dough for a gluten-free alternative. The possibilities are endless!
Final Thoughts
Making Cheesy Taco Sticks is more than just preparing a snack; it’s about creating moments of joy in the kitchen. The delightful aroma wafting through your home as they bake is sure to bring smiles to your family’s faces. Whether you’re hosting a gathering or simply enjoying a cozy night in, these cheesy delights are a hit every time. Plus, they’re so easy to customize, making them a versatile option for any occasion. I hope you find as much joy in making and sharing these tasty treats as I do. Happy cooking!
PrintCheesy Taco Sticks: Your New Favorite Snack Recipe!
- Total Time: 30 minutes
- Yield: 12 sticks 1x
- Diet: Gluten Free
Description
Cheesy Taco Sticks are a delicious and easy-to-make snack that combines the flavors of tacos with gooey cheese, perfect for parties or a quick bite.
Ingredients
- 1 package of taco seasoning
- 1 lb ground beef
- 1 cup shredded cheddar cheese
- 1 cup shredded mozzarella cheese
- 1 package of crescent roll dough
- 1/2 cup diced tomatoes
- 1/4 cup chopped green onions
- 1/4 cup sour cream (for serving)
Instructions
- Preheat the oven to 375°F (190°C).
- In a skillet, cook the ground beef over medium heat until browned. Drain excess fat.
- Add taco seasoning and water as per package instructions. Stir and simmer for 5 minutes.
- Roll out the crescent roll dough and cut it into triangles.
- Place a spoonful of the beef mixture on the wide end of each triangle.
- Add a sprinkle of cheddar and mozzarella cheese on top of the beef.
- Roll the dough from the wide end to the tip, sealing the edges.
- Place the rolled sticks on a baking sheet lined with parchment paper.
- Bake for 12-15 minutes or until golden brown.
- Serve warm with diced tomatoes, green onions, and sour cream.
Notes
- Feel free to add jalapeños for extra spice.
- These can be made ahead of time and frozen before baking.
- Experiment with different types of cheese for varied flavors.
- Prep Time: 15 minutes
- Cook Time: 15 minutes
- Category: Snack
- Method: Baking
- Cuisine: Mexican
Nutrition
- Serving Size: 1 stick
- Calories: 150
- Sugar: 1g
- Sodium: 300mg
- Fat: 8g
- Saturated Fat: 4g
- Unsaturated Fat: 2g
- Trans Fat: 0g
- Carbohydrates: 12g
- Fiber: 1g
- Protein: 8g
- Cholesterol: 30mg
Keywords: Cheesy Taco Sticks, Snack Recipe, Easy Appetizer