
Almond Flour Waffles with Coconut Cream: A Delicious Treat!
Introduction to Almond Flour Waffles with Coconut Cream
As a busy mom, I know how precious those morning moments can be. That’s why I love making Almond Flour Waffles with Coconut Cream. They’re not just a delicious treat; they’re a quick solution for those hectic mornings when you need something special without the fuss. Imagine fluffy waffles topped with creamy coconut goodness, all while being gluten-free! This recipe is perfect for impressing your loved ones or simply indulging yourself. Trust me, once you try these waffles, they’ll become a breakfast staple in your home!
Why You’ll Love This Almond Flour Waffles with Coconut Cream
These Almond Flour Waffles with Coconut Cream are a game-changer for busy mornings. They come together in just 25 minutes, making them a breeze to whip up. The taste? Absolutely divine! The nutty flavor of almond flour pairs perfectly with the rich, creamy coconut topping. Plus, they’re gluten-free, so everyone can enjoy them without worry. Trust me, once you try them, you’ll be hooked!
Ingredients for Almond Flour Waffles with Coconut Cream
Gathering the right ingredients is the first step to creating these delightful Almond Flour Waffles with Coconut Cream. Here’s what you’ll need:
- Almond Flour: This gluten-free flour gives the waffles a nutty flavor and a lovely texture.
- Eggs: They provide structure and moisture, making the waffles fluffy and light.
- Almond Milk: A dairy-free alternative that keeps the batter smooth and adds a hint of nuttiness.
- Coconut Oil: This adds richness and a subtle coconut flavor, enhancing the overall taste.
- Baking Powder: Essential for making the waffles rise and become airy.
- Vanilla Extract: A splash of this adds warmth and depth to the flavor profile.
- Salt: Just a pinch to balance the sweetness and enhance the flavors.
- Coconut Cream: The star of the show! Whipped to fluffy perfection, it’s the perfect topping.
- Honey or Maple Syrup (optional): Sweeten the coconut cream or the batter to your liking for an extra touch of sweetness.
For exact measurements, check the bottom of the article where you can find everything listed for easy printing. Feel free to experiment with these ingredients; for instance, you can swap almond milk for any other plant-based milk or use ghee instead of coconut oil if you prefer. The possibilities are endless!
How to Make Almond Flour Waffles with Coconut Cream
Now that you have your ingredients ready, let’s dive into the fun part—making these delicious Almond Flour Waffles with Coconut Cream! Follow these simple steps, and you’ll have a breakfast that’s sure to impress.
Step 1: Combine Dry Ingredients
Start by taking a mixing bowl and adding the almond flour, baking powder, and salt. Whisk them together until they’re well combined. This step is crucial because it ensures that the baking powder is evenly distributed, helping your waffles rise beautifully.
Step 2: Mix Wet Ingredients
In another bowl, whisk together the eggs, almond milk, melted coconut oil, and vanilla extract. Make sure everything is blended well. The wet ingredients will bring moisture and flavor to your waffles, making them fluffy and delicious.
Step 3: Combine Mixtures
Now, pour the wet mixture into the bowl with the dry ingredients. Stir gently until everything is just combined. Be careful not to overmix; a few lumps are perfectly fine. This will keep your waffles light and airy!
Step 4: Preheat Waffle Maker
While you’re mixing, it’s a good idea to preheat your waffle maker. Lightly grease it with a bit of coconut oil to prevent sticking. This step is key to achieving that golden-brown, crispy exterior we all love.
Step 5: Cook the Waffles
Once your waffle maker is hot, pour the batter into it according to the manufacturer’s instructions. Close the lid and let it cook until the waffles are golden brown. This usually takes about 3-5 minutes, but keep an eye on them. The smell will be heavenly!
Step 6: Prepare Coconut Cream
While the waffles are cooking, grab your coconut cream. Whip it until it’s fluffy and light. If you want a touch of sweetness, add honey or maple syrup to taste. This creamy topping is what makes these waffles truly special!
Step 7: Serve and Enjoy
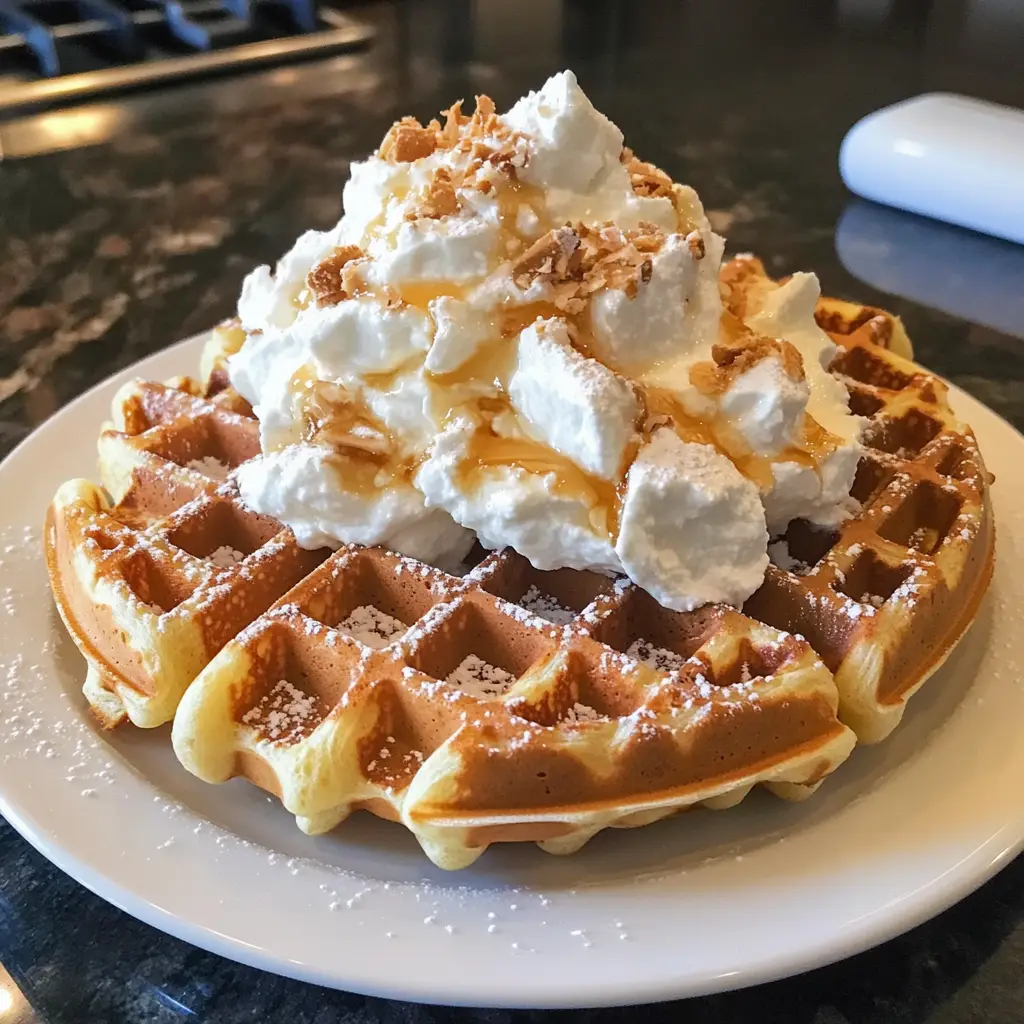
Once the waffles are done, carefully remove them from the waffle maker. Serve them warm, topped with your whipped coconut cream. You can also add fresh fruit or a drizzle of syrup for an extra treat. Enjoy every bite of this delightful breakfast!
Tips for Success
- Make sure your waffle maker is fully preheated for the best texture.
- Use room temperature ingredients for a smoother batter.
- Don’t overmix the batter; a few lumps are okay!
- Experiment with toppings like fresh berries or nuts for added flavor.
- Store leftover waffles in an airtight container for up to 3 days.
Equipment Needed
- Waffle Maker: Essential for cooking the waffles. A non-stick version works best.
- Mixing Bowls: Use two bowls—one for dry ingredients and one for wet.
- Whisk: Perfect for blending ingredients smoothly. A fork can work in a pinch.
- Measuring Cups and Spoons: For accurate ingredient measurements.
Variations
- Chocolate Chip Waffles: Add a handful of dairy-free chocolate chips to the batter for a sweet twist.
- Berry Bliss: Fold in fresh or frozen berries like blueberries or raspberries for a fruity flavor.
- Spiced Waffles: Add a pinch of cinnamon or nutmeg to the dry ingredients for a warm, cozy taste.
- Nutty Delight: Mix in chopped nuts like walnuts or pecans for added crunch and nutrition.
- Vegan Option: Substitute eggs with flax eggs (1 tablespoon ground flaxseed mixed with 2.5 tablespoons water) for a plant-based version.
Serving Suggestions
- Fresh Fruit: Serve with sliced bananas, strawberries, or blueberries for a burst of color and flavor.
- Maple Syrup: Drizzle pure maple syrup over the waffles for added sweetness.
- Nut Butter: Spread almond or peanut butter for a protein boost.
- Presentation: Stack the waffles high and top with whipped coconut cream for a stunning display.
FAQs about Almond Flour Waffles with Coconut Cream
Can I make these Almond Flour Waffles with Coconut Cream ahead of time?
Absolutely! You can prepare the batter the night before and store it in the fridge. Just give it a good stir before cooking. Alternatively, cook the waffles ahead of time and reheat them in a toaster for that crispy texture.
What can I use instead of almond flour?
If you don’t have almond flour, you can try using coconut flour. Just remember, coconut flour is more absorbent, so you’ll need to adjust the liquid in the recipe. A good rule of thumb is to use 1/4 cup less liquid for every cup of coconut flour.
How do I store leftover waffles?
Store any leftover Almond Flour Waffles in an airtight container in the refrigerator for up to 3 days. You can also freeze them for longer storage. Just pop them in the toaster when you’re ready to enjoy!
Can I make these waffles dairy-free?
<pYes! This recipe is already dairy-free thanks to almond milk and coconut cream. Just ensure that any toppings you choose, like nut butter or syrup, are also dairy-free.
What toppings pair well with these waffles?
These waffles are incredibly versatile! You can top them with fresh fruit, a drizzle of maple syrup, or even a dollop of nut butter. The whipped coconut cream is a must-try, but feel free to get creative!
Final Thoughts
Making Almond Flour Waffles with Coconut Cream is more than just a breakfast; it’s a joyful experience that brings the family together. The aroma of freshly cooked waffles fills the kitchen, creating a warm and inviting atmosphere. Each bite is a delightful blend of nutty and creamy flavors that can brighten even the busiest mornings. Plus, knowing that they’re gluten-free makes them a guilt-free indulgence. Whether you’re treating yourself or sharing with loved ones, these waffles are sure to create lasting memories. So, roll up your sleeves and enjoy the deliciousness that awaits!
PrintAlmond Flour Waffles with Coconut Cream: A Delicious Treat!
- Total Time: 25 minutes
- Yield: 4 servings 1x
- Diet: Gluten Free
Description
Almond Flour Waffles with Coconut Cream are a delightful and healthy breakfast option, perfect for those looking for a gluten-free treat.
Ingredients
- 1 cup almond flour
- 2 large eggs
- 1/4 cup almond milk
- 1 tablespoon coconut oil, melted
- 1 teaspoon baking powder
- 1/2 teaspoon vanilla extract
- 1/4 teaspoon salt
- 1 cup coconut cream
- 1 tablespoon honey or maple syrup (optional)
Instructions
- In a mixing bowl, combine almond flour, baking powder, and salt.
- In another bowl, whisk together eggs, almond milk, melted coconut oil, and vanilla extract.
- Pour the wet ingredients into the dry ingredients and mix until well combined.
- Preheat your waffle maker and lightly grease it with coconut oil.
- Pour the batter into the waffle maker and cook according to the manufacturer’s instructions until golden brown.
- While the waffles are cooking, whip the coconut cream until fluffy. Add honey or maple syrup if desired.
- Serve the waffles warm topped with coconut cream.
Notes
- For a sweeter waffle, add more honey or maple syrup to the batter.
- These waffles can be stored in the refrigerator for up to 3 days.
- Reheat in a toaster for a crispy texture.
- Prep Time: 10 minutes
- Cook Time: 15 minutes
- Category: Breakfast
- Method: Waffle Maker
- Cuisine: American
Nutrition
- Serving Size: 1 waffle with cream
- Calories: 250
- Sugar: 2g
- Sodium: 150mg
- Fat: 18g
- Saturated Fat: 10g
- Unsaturated Fat: 8g
- Trans Fat: 0g
- Carbohydrates: 20g
- Fiber: 3g
- Protein: 6g
- Cholesterol: 70mg
Keywords: Almond Flour Waffles, Coconut Cream, Gluten Free Breakfast